Dad and the Pour-Over
A couple weekends ago, my dad asked me:
"What's the best way to make just one cup of coffee so I don't waste a whole pot?"
I knew this would be an easy sell — his question alone perfectly described a pour-over dripper. Up until now, my parents have always used a Mr. Coffee auto-drip machine to make all of their coffee. And while that's perfectly fine (don't let anyone tell you your method is "wrong" if you enjoy it), it just doesn't make the best cup of coffee. Nobody can argue that.
Auto-drip brewers often have years of coffee oil buildup that can make even the freshest coffee taste stale. They normally also have issues with temperature. The brew temp of the water is not hot enough, and the warming plate often bakes the coffee by keeping it too hot for too long.
What We Purchased
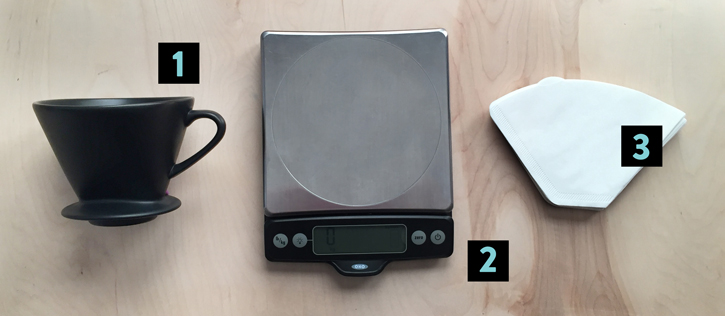
So anyway, I jumped at the chance to get him brewing on something that would let him experience a better cup of coffee. For only $25.00, we picked up the essentials for making pour-over. Here is what we purchased:
1. Pour-over dripper (~$7)
2. Small kitchen scale (~$15)
3. Cone filters (~$3)
What We Skipped Purchasing
The only two things we didn't buy that would have made an even bigger improvement were a burr grinder and a goose-neck kettle. My favorite grinder and kettle for home use are the Baratza Encore, and the Bonavita Electric Goose-neck kettle. As you can see, the addition of those two items raises the cost significantly.
Dad has a blade grinder that will work for now. Even though blade grinders produce an inconsistent grind, if I had to pick between grinding with a blade grinder, or pre-ground beans, I'd pick the blade grinder. Fresh ground is the way to go. You can easily find one for around $10 at any big box store if you're not ready for the burr grinder investment.
As for the goose-neck kettle, it just provides more control for your pouring so you get less splashing and you can wet all grounds evenly.
Pour-Over Recipe
Here is a basic recipe for making pour-over yourself. It might look complicated, but after doing it once or twice, you'll see it's quite easy.
1. Measure out your coffee beans and your water. Use a 16:1 ratio (16 grams of water for every 1 gram of coffee). For this example, we'll say you're brewing into a large coffee mug (16 oz) that holds 320 grams of water, so you'll need 20 grams of coffee beans. Use that shiny new scale to find these numbers.
2. Heat your 320 grams of water until it boils, then take off the heat for about 30 seconds. That should get ya close to 200-205 degrees Fahrenheit.
3. Dump your 20 grams of coffee into your grinder and grind to a medium grind.
4. Put a filter in your dripper and add your ground coffee.
5. Sit the dripper on an empty cup (This part is important, dad).
6. Pour in a little water to saturate all the grounds and wait 30 seconds. This step is called "blooming" the coffee. It lets the coffee release carbon dioxide. The fresher the coffee, the more bloom you'll experience. Skipping this step can sometimes lead to an off taste in the cup.
7. After 30 seconds of blooming, keep adding a little water at a time until all water has been used. Make sure to wet all grounds evenly.
8. Enjoy!
So, What Was the Result of Dad's Adventure into Pour-Over?
After one week, here is what he had to say:
"It's the first thing I do while I'm getting ready in the morning. I look forward to it. It's just as easy as making a whole pot of coffee but without the waste. The flavor is nice and strong and has a good punch to it, not bitter or acidic like some strong coffee can be. "
So there you have it — I'm calling that a win!